Showing posts with label Recipes. Show all posts

Tuesday, September 27, 2011

Inside Out Apple Pie

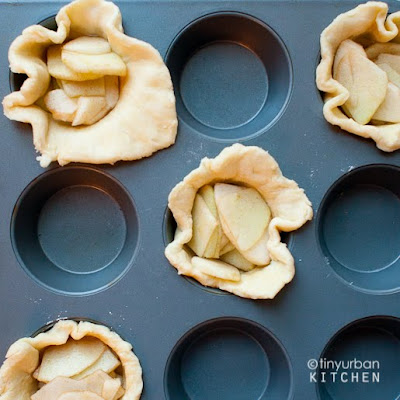
Who doesn't love a dessert that cleverly presented and delicious?! This super creative Inside Out Apple Pie is from Tiny Urban Kitchen and would make a great treat for adults or kids. For the entire recipe and a step by step picture tutorial click here.


Monday, September 12, 2011

Pumpkin Chocolate Chip Muffins

Image { Recipe Girl }

While I am looking forward to Halloween, I am resisting all other things fall, specifically the cool weather. I just don't want to admit that summer is over and another long winter will soon be upon us. When I saw these Pumpkin Chocolate Chip Muffins on Recipe Girl it helped to ease my negative fall attitude. I am always looking for quick yummy breakfast and snack ideas and I think these would be a hit with my kiddos too!

Pumpkin- Chocolate Chip Muffins
Yield: 18 muffins

Prep Time: 15 min
Cook Time: 18 min
Delicious combination of pumpkin and chocolate in a morning muffin...

Ingredients:
2 1/4 cups all-purpose flour
1 1/2 teaspoons baking soda
1 1/2 teaspoons baking powder
1/2 teaspoon salt
1 cup granulated sugar
1 1/2 teaspoons pumpkin pie spice
2 large eggs
1 1/2 cups pure canned pumpkin
1 cup unsweetened applesauce
2 Tablespoons canola or vegetable oil
1 1/2 teaspoons vanilla extract
1 cup chocolate chips

Directions:
1. Preheat oven to 350°F. Lightly spray 18 muffin tin cups with nonstick spray.

2. In a medium bowl, whisk together dry ingredients (through pie spice).

3. In a large bowl, whisk together eggs, pumpkin, applesauce, oil and vanilla until well blended. Stir in dry ingredients and mix only until combined (do not over mix). Gently fold in chocolate chips.

4. Scoop into muffin pans and bake 18 to 20 minutes. Turn onto rack and cool.

Tips:
*Use an ice cream scoop with a spring handle to scoop the batter into the muffin tins- it's so easy and no mess.

Source: RecipeGirl.com

Halloween Caramel Apples

I can't get over how fun these Halloween caramel apples from Distracted Homemaker are!! Talk about creative. You can view the step by step picture tutorial here. Have a great Monday!


Friday, August 12, 2011

Colored Layer Cake

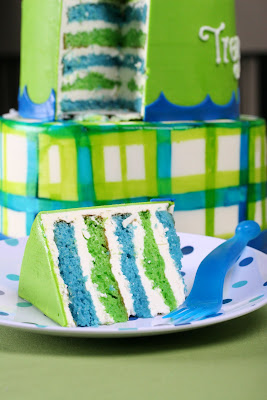
Have you seen the new trend of coordinating the cake to match your events color palette? These cakes are popping up everywhere from weddings to kids birthday parties, and I think they are simply fantastic! . Here are a few I have seen over the last week. Martha Stewart offers up a quick and easy layer cake recipe and frosting instructions here.


{Image} Amy Atlas


{Image} Attention 2 Detail


{Image} Martha Stewart


Tuesday, August 2, 2011

Lemon Meringue Pie Shots

I am a big fan of dessert shots. They are cute and offer guests an alternate portion size. I made these chocolate pie shots for my cousins baby shower last year, and they were a huge hit! I was delighted to come across the lemon meringue pie shots below on Honest Cooking. They would make a perfect light summer dessert don't you think? And, what hostess doesn't love a dessert that can be completely or partially made ahead of time?!


{ Image } Honest Cooking

Ingredients
Lemon Curd
■8 egg yolks
■3/4 cup (1,75 dl) sugar
■1/2 cup (1,18 dl or 1 stick) unsalted butter, softened
■zest of 2 lemons
■1/2 cup (1,18 dl) lemon juice
Italian Meringue
■8 oz (227 grams) sugar
■2 oz (57 grams) water
■4 oz (113 grams) egg whites
Assembly
■30-35 vanilla wafer cookies, crushed
■24 shot glasses (I found these plastic ones at a party supply store)


Instructions
Lemon Curd


1.Combine the egg yolks, sugar, butter, lemon zest and juice in a medium stainless sleet or glass bowl, and set over a saucepan of barely simmering water.


2.Whisk constantly until lemon curd thickens and reaches 175 degrees F.


3.Remove from heat and let cool, whisking every few minutes to aid cooling.


4.Cover with plastic wrap so the plastic touches the surface of the curd and chill for a few hours or overnight, the curd will continue to set up as it chills.


5.This can be made in advance, you can store it in the refrigerator for 1-2 weeks or freeze.


Italian Meringue


1.Cook the sugar and water together in a small saucepan over high heat until it comes up to 243 degrees F.


2.When the mixture reaches about 230-235 F, begin whipping the egg whites in a stand mixer on medium-low speed until they are foamy.


3.When the sugar reaches 243 degrees F, remove from heat, and pour very slowly in a steady stream into the whipping egg whites.


4.As soon as all the sugar is incorporated, turn the mixer onto high, and whip until completely cool.


Assembly


1.Place a small amount of crushed cookie into the bottom of each shot glass.


2.Transfer your lemon curd to a pastry bag and pipe a small amount into each glass.


3.Top each glass with more crushed cookies.


4.Transfer your meringue into a pastry bag fitted with a large plain tip and pipe a big dollop on top of each shot glass.


5.Using a kitchen torch, carefully toast each meringue top until they are golden brown. If you are using plastic shot glasses, be mindful just to toast the tops of the meringues, otherwise you run the risk of melting the plastic.


6.Refrigerate until ready to serve.

Monday, August 1, 2011

Zoku Quick Pop Maker

We love making our own popsicles at our house, but my kids usually drive me crazy waiting for them to freeze. Are they ready yet? Are they ready yet? Are they ready yeeeeeet?? You get it, right?! Well goodbye whining, and helllllllo Zoku! This nifty gadget makes popsicles in 7-9 minutes. Amazing! And, the recipes sound quite delicious...marble cheesecake, key lime pie, and just peachy, to name a few. You can purchase the Zoku Quick Pop Maker here at the Zoku store or here at Williams-Sonoma.


Monday, July 18, 2011

S'mores Stuffed Brownies


We just got back from camping last week and my kids are still obsessing over s'mores. Can't blame them, they are delicious!! I was looking for s'mores recipes and came across these bites of heaven on Food Snots. The recipe is simple and they sound YUMMY!! Stop by Food Snots and check out all the other fab recipes.


Ingredients
1 box of your favorite brownie mix
4 1/2 full Graham Crackers
3 1/2 full size Hershey's Bars
16 large marshmallows (I substituted half of a bag of mini marshmallows cause that what I had)
Preheat oven to 350 degrees. Prepare brownie mix according to package directions. Line foil into a 8x8 inch baking pan and spray generously with cooking spray. Pour half the brownie batter into lined pan. Layer graham crackers over brownies following Hershey Bars and marshmallows. Pour remaining brownie batter over marshmallows (I found it useful to spray a spatula with cooking spray and use it to smooth the batter over any exposed marshmallows). Bake for 40-45 minutes or until toothpick comes mostly clean from center. Remove from oven and let cool completely. Carefully remove foil and brownies from pan. Peel any foil from away from edges and cut into squares.

Thursday, July 7, 2011

Oreo Ice Cream Sandwich Cake

Ice cream cakes are hands down my favorite cakes and semi-homemade recipes are also a favorite of mine. This ice cream sandwich cake from Kraft is like a dream come true! They also offer a video here for those of us that are visual learners. Don't you think it's a perfect summer dessert?!


What You Need1/2 cup hot fudge ice cream topping, warmed
1 tub (8 oz.) COOL WHIP Whipped Topping, thawed, divided
1 pkg. (3.9 oz.) JELL-O Chocolate Instant Pudding
8 OREO Cookies, chopped (about 1 cup)
12 vanilla ice cream sandwiches
Make It
POUR fudge topping into medium bowl. Whisk in 1 cup COOL WHIP. Add dry pudding mix; stir 2 min. Stir in chopped cookies.

ARRANGE 4 ice cream sandwiches, side-by-side, on 24-inch-long sheet of foil; top with half the COOL WHIP mixture. Repeat layers. Top with remaining sandwiches. Frost top and sides with remaining COOL WHIP. Bring up foil sides; double fold top and ends to loosely seal packet.

FREEZE 4 hours or until firm.
Kraft Kitchens TipsNoteThe consistency of fudge topping can vary depending on what brand you purchase. If the fudge topping mixture is too thick to spread easily, stir in 1/4 cup milk.

Tuesday, July 5, 2011

Orange Crush Cupcakes

This fun recipe is from Nothing but Country, a sweet blog dedicated to cooking, crafting, and country life. Definitely a unique cupcake recipe to try, and orange creamsicles are my favorite popsicle, so I'm sure I'll love them!!

Orange Crush Soda Cupcakes
350 degrees
13 – 15 minutes (convection oven)


CUPCAKE

1 cup butter
2 cup sugar
4 eggs
4 cup sifted all-purpose flour
1 tsp. vanilla
1/2 tsp. baking soda
1 bottle of Orange Crush Soda (12 oz)
1 TBS fresh orange zest

•Butter is best at room temperature. Cream together your butter and sugar.
•One at a time, add in your eggs and beat for a minute more.
•Add in your sifted flour and baking soda, and alternate 1 cup of flour and some of your soda. Till you have added and blended it all together well.
•Mix in your orange zest and vanilla last.
•Pour into your cupcake liners. We use an icecream scoop that scrapes the icecream out. One hefty scoop per cupcake filled it 3/4 of the way.
•Bake for 13-15 minutes (convection oven) And 19-23 minutes regular oven. But watch them. They will not need to get golden brown. Just till toothpick inserted and removed is clean.
•Cool completely before you add your frosting/icing.
FROSTING

1 cup butter
4 cups powdered sugar
1/8 cup fresh orange juice
1 TBS orange zest
1 tsp vanilla
(Approx) 1/8 cup Orange Crush Soda
Gummy Orange Slices

•Butter at room temperature beat your butter till nicely whipped.
•Add in slowly your 4 cups of powder sugar alternating with your 1/8 cup of fresh orange juice.
•Add in your orange zest and Vanilla.
•If your frosting is too thick, I added approx. 1/8 cup of Orange Crush Soda to the frosting. Adding a little at a time till I got the consistency I wanted.
•Pipe frosting on your cooled cupcakes.
•Garnish with orange slice candy.


Thursday, June 30, 2011

Rainbow Doodle Cake

I came across this rainbow doodle birthday cake on Sweetapolita, and just had to share it. The colors are fantastic and the design concept is brilliant. Made mostly with buttercream and covered in white fondant, the little artist's can then go to work! You can view the recipe and how to's here. And I tell my boys they can only draw on paper ;)...who knew!!


Tuesday, June 28, 2011

Fireworks Cupcakes

Loving these fireworks cupcakes from Wilton. They don't look to difficult and they are definitely bursting with color. This top recipe uses royal icing for the bursting fireworks, but I think you could use twizzler pull and peels cut to size, inserted into your cupcake. You can find red, white, and blue star sprinkles at just about any store this time of year. Fun stuff!!
{ Image } Wilton

Instructions:
Step 1
In advance: Make fireworks. Prepare Royal Icing recipe. Tint half Red-Red/Christmas Red combination and half blue. Cover pattern with parchment paper. Using royal icing, pipe Round Decorating Tip 5 fireworks; make 240 red and 240 blue fireworks arcs (20 for each cupcake; number includes extras to allow for breakage); let dry.
Step 2
Bake and cool cupcakes in your favorite Patriotic Themed Baking Cups.
Step 3
Prepare Buttercream Icing recipe. Using white buttercream icing, pipe Large Star Decorating Tip 1M swirls on tops of cupcakes.
Step 4
Insert fireworks arcs and attach icing decorations using white buttercream icing and Round Decorating Tip 5 dots.
Step 5
To assemble, place 10 in. plate and pillars on Cake Base. Place 6 in. plate and pillars on 10 in. plate. Place one pillar on 6 in. plate. Position 1 cupcake on top pillar, 4 cupcakes on 6 in. plate, 8 cupcakes on 10 in. plate and remainder on Cake Base.


{ Image } Wilton

Instructions:
Step 1
Bake cupcakes in Stars & Stripes or Patriotic Themed Standard Baking Cups and cool completely on Cooling Grid.
Step 2
Prepare Buttercream Icing recipe. Tint 1/3 of icing with Royal Blue Icing Color. Tint another 1/3 icing with Christmas Red Icing Color.
Step 3
For fireworks, pipe a ring of fringe around rim of cupcake with blue icing and Multi-Opening Decorating Tip 233. Using same tip, pipe a concentric circle with white icing. Finish by piping red icing fringe in the center and inserting a 4th of July Party Pick.

Saturday, June 25, 2011

Frozen Reece's Peanut Butter Pie


I am trying to talk myself out of making this delicious frozen Reece's peanut butter pie from Bakers Royale, but I absolutely think you should try it!! C'mon peanut butter, oreos, and whip cream...YUM!!!


Frozen Reese’s Peanut Butter Pie
Makes one 9 inch pie or three 4 inch mini pies. Preparation: Lightly butter springform pan if it is not non-stick. If you do not have a springform pan line a cake pan with a piece of lightly buttered foil leaving a one inch over hang around the edges for easy pie removal or alternately use a traditional pie pan.

•24 oreo cookies, crushed
•4 tablespoon unsalted butter, melted
•2 ½ cups Cool Whip
•¾ cup creamy peanut butter
•½ cup confectioner sugar
•½ cup crushed Reeses Peanut Butter Cups
Oreo Crust Instructions:

1.Place Oreos in a food processor or blender and pulse until cookies are finely crumbed. Alternatively, place Oreos in a plastic bag and crush with a rolling pin. Mix in the melted butter and then firmly press crumbs into pan to create a crust. Bake crust at 350 degrees F for 7-10 minutes.
Reese Peanut Butter Pie Filling Instructions:

1.Place peanut butter and confectioner sugar in a pan over low heat and stir until combined and peanut butter is melted. Set aside for five minutes to cool. Gently fold in peanut butter mixture into Cool Whip until combined. Gently fold in crushed Reese’s pieces into peanut butter Cool Whip mixture.
2.Pour mixture into Oreo crust and freeze for 3 hours. Garnish with caramel and chocolate drizzle (for added decadence rim with chopped Reese’s pieces).

Monday, June 20, 2011

Cupcake Push Pop

Looking for a treat to delight the little guests on the 4th of July? How about these trendy and oh so cute cupcake push pops. Cupcake push pops are all over right now and the upcoming holiday is the perfect opportunity for you to try them out!! Lindsay Ann from Dollhouse Bake Shoppe offers a step by step tutorial here on Celebrations. If you give them a try e mail me a picture, I would love to see them!


Image { Dollhouse Bake Shoppe }

Tuesday, June 7, 2011

Coffee Can Ice Cream

My boy's and I created a summer " to do " list this year and one of the things on our list is to make coffe can ice cream. I thought this would be fun since neither of them have ever done it and who doesn't love ice cream on a hot summer day! It would also make for a super fun activity for kids at a birthday party or BBQ. Here is the recipe we are using from Kaboose , but you can also find some really yummy recipes here.


What you'll need:1 pint of half and half
1/3 cup granulated sugar
4 tablespoons of your favorite instant pudding mix (chocolate was used here)
10 cups ice
1 1/2 cup rock salt (kosher salt or sea salt can be used too)
3-pound coffee can, emptied and rinsed
1-pound coffee can, emptied and rinsed
Duct tape


How to make it:In a medium bowl, combine half and half, sugar, and pudding mix with a whisk until thoroughly mixed.
Place 1-pound coffee can inside the 3-pound coffee can and pour ice cream mixture into smaller can. Cover the smaller can with it’s corresponding lid and seal with duct tape.
Surround the smaller can with ice and salt by layering 5 cups of ice with 3/4 cup of salt.
Use duct tape to seal the 3-pound can with its corresponding lid and start rolling. Have the kids face each other and roll the can back and forth on its side for 10 minutes.
After 10 minutes, open the cans and check the ice cream. Remove the smaller can and check the ice cream. The mixture on the sides of the smaller can will set up faster than the center. Use a rubber spatula to quickly scrape down the sides and give the ice cream one stir.
Next, reseal the lid on the smaller can with duct tape, and set it aside. Quickly dump the melted ice water from the large can, and place the smaller can into the larger can again.
Now you need to surround the smaller can with remaining ice and salt by repeating step 3. Once that is done, put the lid on the larger can and seal with duct tape again.
Ask the kids to roll the large can for 10 minutes more.
Once they're done, open the cans again and serve the ice cream to your little helpers!
Tips:>>Use your favorite flavor of pudding to change the ice cream flavor.

>>After the first 10 minutes of kicking around the can, mix in some nuts or chocolate chips to enhance the flavor of your ice cream.

>>If the children get tired of kicking that can around after only 10 minutes, take this shortcut: Stir the mixture and set it in the freezer for about an hour to allow the rest of it to harden.

Friday, February 11, 2011

Homemade Marshmallows

I think these homemade pink marshmallows from No Fuss Fabulous would make and adorable Valentine's Day treat for your Valentine. I have not made them myself, but my friend Kerrissa made them for a school party last year and they were DELICIOUS! The pale pink is a perfect shade also, don't you think??


Image { No Fuss Fabulous }

Here is a reipe for these yummy bites from Martha Stewart
Makes about 40

2 1/2 tablespoons unflavored gelatin
1 1/2 cups granulated sugar
1 cup light corn syrup
1/4 teaspoon salt
2 tablespoons pure vanilla extract
Confectioners' sugar, for dusting
Directions
1.Combine gelatin and 1/2 cup cold water in the bowl of an electric mixer with whisk attachment. Let stand 30 minutes.
2.Combine granulated sugar, corn syrup, salt, and 1/2 cup water in a small heavy saucepan; place over low heat, and stir until sugar has dissolved. Wash down sides of pan with a wet pastry brush to dissolve sugar crystals.
3.Clip on a candy thermometer; raise heat to high. Cook syrup without stirring until it reaches 244 degrees.(firm-ball stage). Immediately remove pan from heat.
4.With mixer on low speed, slowly and carefully pour syrup into the softened gelatin. Increase speed to high; beat until mixture is very thick and white and has almost tripled in volume, about 15 minutes. Add vanilla; beat to incorporate.
5.Generously dust an 8-by-12-inch glass baking pan with confectioners’ sugar. Pour marshmallow mixture into pan. Dust top with confectioners’ sugar; wet your hands, and pat it to smooth. Dust with confectioners’ sugar; let stand overnight, uncovered, to dry out. Turn out onto a board; cut marshmallows with a dry hot knife into 1 1/2-inch squares, and dust with more confectioners' sugar.
.

Read more at Marthastewart.com: Homemade Marshmallows - Martha Stewart Recipes

Thursday, January 20, 2011

Cupcake Balls

What do you get when you combine the deliciousness of a cake pop with the cuteness of a cupcake? These ULTRA adorable cupcake balls by Jessicakes.
Genius I tell you !!! You have to check out her step by step tutorial here.


Images via Jessicakes

Wednesday, December 22, 2010

Coconut Ice Cream Snowman by Martha

I love this coconut ice cream snowman I came across on Martha Stewart. It would be perfect for the kids as a treat on Christmas Eve or Christmas. Yummy and cute!


Makes 4

2 1/2 pints best-quality vanilla ice cream
Two 7-ounce packages coconut
Orange food coloring
FOR THE NOSE
1 tablespoon marzipan (1/4 ounce)
FOR THE EYES, MOUTH, AND BUTTONS
40 Sen Sen licorice candies
FOR THE HAT
4 marshmallows
4 chocolate wafers
Sifted confectioners' sugar
Directions
1.Line a baking pan that fits in your freezer with parchment paper. Scoop the vanilla ice cream, rounding scoops as much as possible, until you have 4 of each size, and place on the prepared baking pan. Place the pan in the freezer to harden for 15 minutes.
2.Remove the ice cream from the freezer, and roll in coconut. Return to pan, then return the pan to the freezer. Add orange food coloring to marzipan until carrot color is attained. Shape marzipan into small carrot shapes, using a paring knife to make ridges. Remove 1 small scoop of ice cream at a time from the freezer, and make faces using Sen Sen for eyes and mouth and marzipan carrots for the nose. Return to freezer until ready to serve.
3.Remove middle-size scoops from the freezer one at a time; place Sen Sen in a row down the front to create buttons. Remove remaining scoops from freezer, and stack to create snowmen, pressing slightly to adhere. Return snowmen to freezer.
4.Make the top hats by roasting marshmallows on skewers over a gas burner. Alternatively, place marshmallows on a baking sheet under the broiler, and cook until browned, rotating every few seconds. Place the toasted marshmallow on the chocolate wafer, and dust with sifted confectioners' sugar. Place the hat on the snowmen just before serving.


Read more at Marthastewart.com: Coconut Snowmen - Martha Stewart Recipes

Monday, November 8, 2010

{ Baby Shower Monday } Baby Face Cupcakes

For your next baby shower how about making these cute little babies from Wilton ?!! Here are their step by step DIY instructions. You can check out more baby shower cupcake ideas from Wilton here. Have a great Monday!!

Instructions

Step 1
Bake cupcakes in White Standard Baking Cups and cool completely on Cooling Grid.


Step 2
Prepare Buttercream Icing recipe and tint with Copper (Light Skintone) Icing Color. Ice cupcakes smooth with skintone icing using Spatula


Step 3
Melt Yellow and Light Cocoa Candy Melts as directed on package. Fill two Disposable Decorating Bags with each of the melted Candy Melts


Step 4
For pacifier, pipe 1 1/4 x 1 1/8 inch ovals with melted Yellow Candy Mets on Non-Stick Parchment Paper. Refrigerate until firm, then peel off parchment and attach yellow hollow-center candy to base with additional melted Candy Melts. Return to refrigerator until set


Step 5
For hair, pipe melted Light Cocoa Candy Melt curls on Non-Stick Parchment Paper. Refrigerate until set; peel off and insert end into top of cupcake


Step 6
For eyes and mouth, pipe melted Light Cocoa Candy Melts onto cupcake. For nose, pipe skintone icing dot with Round Decorating Tip 2.


Step 7
Position pacifier onto cupcake


Friday, October 29, 2010

Hot Tang Lemonade

Image via Flickr

Ingredients:
1 jar (10 oz) Tang orange powder
2 ounces Lemonade powder
2 cups Sugar
2 teaspoons Cinnamon
1 teaspoon Cloves
Directions
Add 2-3 teaspoons to a cup of hot water
Store mix in air tight container
I had my first son on Christmas morning ( what a birthday huh?! ), and the nurses brought me in some of the Hot Tang Lemonade they were having at their Christmas potluck. I will never forget how wonderful it tasted. Every year when it starts to get really cold outside I start craving it. It is a great alternative to tea or coffee. You can also package it up in a mason jar add a cute tag with directions and use it as a holiday party favor or gift. You should definitely treat yourself to some...it really is YUMMY!

Thursday, September 23, 2010

Miniature Caramel Apples

Aren't these miniature caramel apples from Glass Slipper Cakery darling?!! I adore miniature desserts anyways and think these are perfect for a children's Halloween party. I tried these for a kids party we did a few years ago using a recipe from Family Fun, but could not get the caramel to stick and ended up dipping them in melted chocolate chips. I'm anxious to try this recipe from Glass Slipper Cakery :


RECIPE INGREDIENTS:
4-inch lollipop sticks
Melon baller
Granny Smith OR Red Delicious apples (one apple makes about 8 mini apples)
3 oz. Peanut butter chips
2 tsp. shortening
Paper towels
Nonpareils OR sprinkles
Empty egg carton
Cut the lollipop sticks in half at an angle (the pointy end will go into the apple pieces easier).
Combine the peanut butter chips and shortening in a small bowl. (DO NOT use caramel. Due to the moisture of the exposed apple, it will NOT stick!!) Heat chips in the microwave 30 seconds at a time until melted. Set aside to cool down, about 10 minutes.
Scoop a ball out of the apple with the melon baller, exposing a section of apple peel. Work ONLY one ball at a time, to prevent the yucky browning. (See below!)
Push half of a lollipop stick into the peel of the ball.
Pat the apple dry with a paper towel.
Dip and swirl the mini apples in the melted chips, covering the exposed apple completely, leaving only the peel showing. Set aside standing on a plate for 5 minutes.
Roll the apple in sprinkles or nonpareils. Let stand for 15 minutes to harden.
Place the mini "Caramel " apples in an empty egg carton and place in the fridge.
Related Posts with Thumbnails